This chapter shows two methods of traditional strip patchwork:
Log cabin method
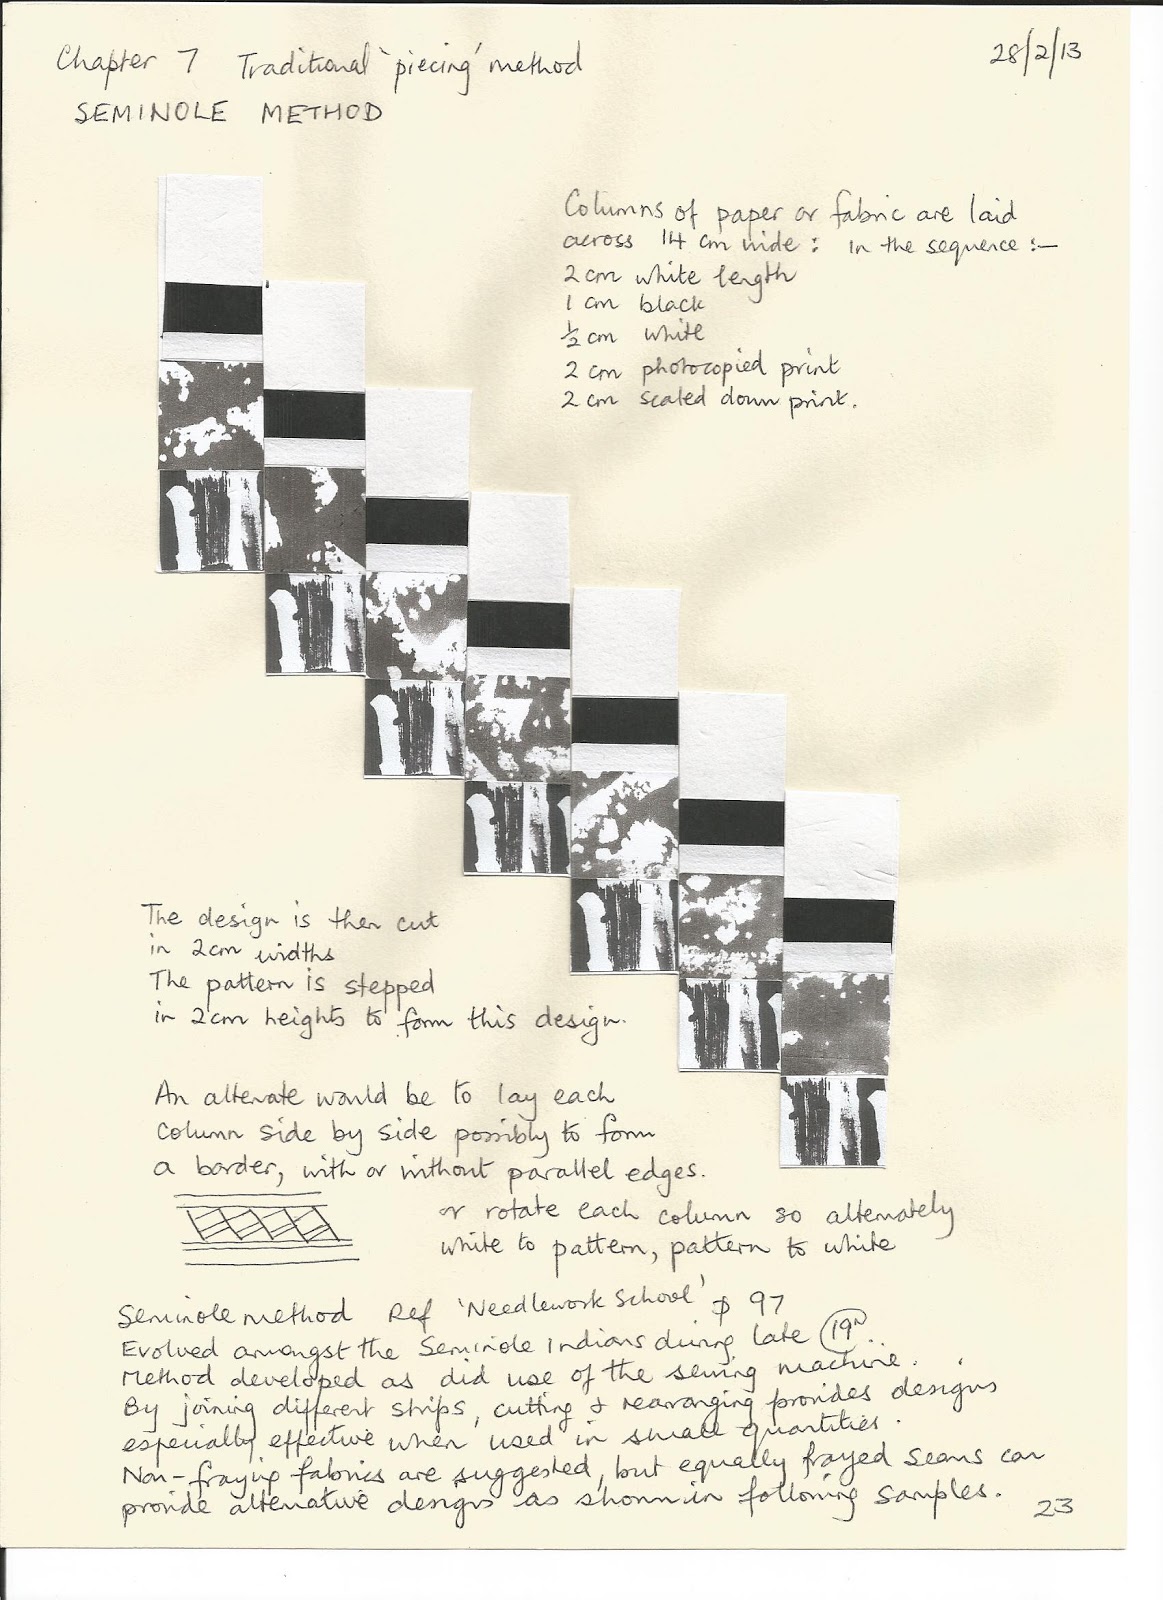
Seminole method
For each method
First stage: paper designs were produced made of paper using plain black and white, painted and monoprinted patterns from an earlier chapter relating to slugs and snails.
Second stage: was making up samples using fabrics, commercial and hand- dyed or monoprinted from paper designs as inspiration.
Log cabin method
Six paper patterns were produced, of which Designs 1 and 2 are shown here:
Two made-up designs are shown next using Design 1 for inspiration and patterned papers:
Followed by a fabric sample using a technique where fabric strips are halved by using running stitch along the middle of the strip to attach to a background fabric. Each strip is folded over. Loose edges are covered by the next overlapping strip of fabric as move around the piece in a clockwise direction.
I was please with the effect. It would be interesting to develop this providing tonal changes from the centre outward. At a later time it would be interesting to do further log cabin method examples. There seems to be more than one method of attaching strips but I found this easier to follow.
Seminole method
First stage: Fourteen paper patterns were produced using black and white paper, then patterned papers in tonal columns, and all designs are shown here:
Second stage
This next sample was made up using some of the patterns above.
Hand-dyed and monoprinted fabrics are included.
It is approximately 12cms by 32cms.
Because the length is greater than A4 two scans are shown and the patterns overlap (the upper scan shows most of the piece).
It took a while to measure to get the strips an appropriate width and length allowing for seams and sometimes I overestimated. I particularly like the top and bottom sections.
I am interested in a possible chequered affect in my main project so here are three examples, using white and a patterned commercial fabrics in the first piece, two patterned fabrics in the second and two hand-dyed in the third.
I may develop the third sample as there is more contrast between the dark and pale pieces, or use several contrasting hand-made fabrics for variety.
Wednesday, 6 March 2013
Wednesday, 13 February 2013
Chapter 6 Patterning of fabrics using dyes and paints
In order to build up a collection of patterned black and white cotton fabrics based on patterned papers in Chapter 5 and from drawings of animal markings in Chapter 4:
Samples were made of
The following handwritten sheets indicate the procedure followed to acquire a number of samples. (Taken from my sketchbook)
Here is a photo of me dyeing all item types
Health and Safety is noted in my sketchbook Chapter 6 page 6
Plain black pieces
I found that different intensity of dye resulted, between greyer versions of the first attempt and darker blue/black in the second attempt. (Each are labelled)
These were made alongside the Shibori samples
Shibori is a name given to several methods where tight pressure is put on certain areas to form a resist to the dye, in this case leaving areas of white against black.
Shibori 'tie and dye'
I must be the worst 'tie and dye' practitioner.
After at least three attempts I did not really suceed.
The following shows a photo of some prepared fabrics (four items on the right) and a couple of dyed samples, the best of a bad bunch. I assume that I was unable to get the mix of dye, salt and soda correct and/or timing of the dyeing and drying.
The final scan in this section indicates some of the dyeing mixes I used.
Tritik Shibori
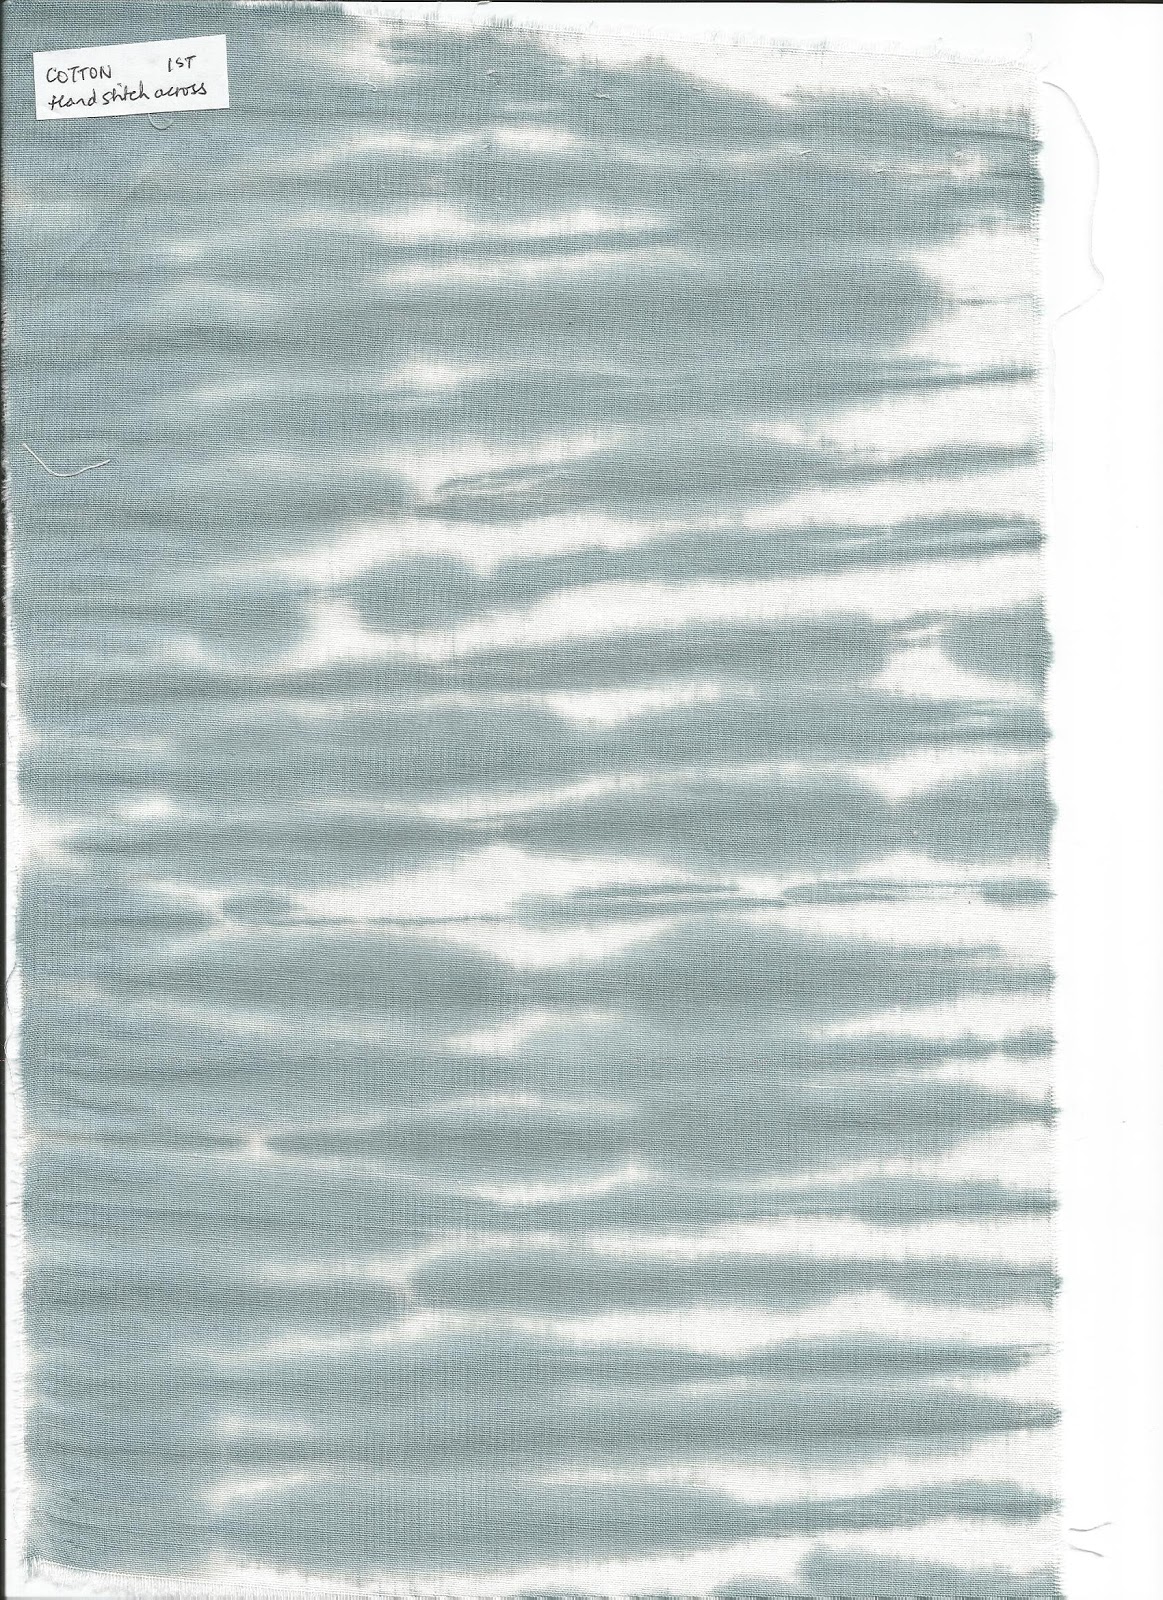
For this the fabrics are hand or machine stitched to gather the fabric together, then the dye is painted using a brush at the edges and left to dry.
The first two photos show the stitching before and after the rows are gathered. I only did handstitched samples.
The samples were left to dry overnight.
I particularly liked the results and felt that all seemed to reflect the slug and snail theme.


Monoprinting -
Painted A4 size white cotton fabrics with black acrylic and clear fabric medium
The following handwritten sheets indicate the procedure followed to acquire a number of samples. (Taken from my sketchbook)
Here is a photo of me monoprinting all item types
Health and Safety is noted in my sketchbook Chapter 5 pages 1 and 5
The following samples are itemised above and are in order:
Samples MF2a and 2b, MF3a and 3b, MF6 (silk), MF7 (silk), MF8, MF9 and white acrylic with clear fabric medium on one of the grey dyed pieces.
Of all the techniques in this chapter I enjoy the rapid results achieved with monoprinting, with more effective tonal variation. I'm sure with practice the dyeing techniques will improve although I was very happy with the Tritik Shibori, in particular where tonal variaton was evident. Also these achieved the markings I wanted.
Last but not least another paper design achieved by leaving fabrics to dry flat on it. Maybe I could have done the same with some fabric!
- Collected a number of black and white cotton fabrics some with abstract patterns (see personal collection)
- Cold water dyed A4 size white cotton fabrics with Dylon black
- Monoprinting - Painted A4 size white cotton fabrics with black acrylic and clear fabric medium
Samples were made of
- Plain black pieces
- Shibori tie and dye
- Tritik Shibori
- Arashi Shibori
The following handwritten sheets indicate the procedure followed to acquire a number of samples. (Taken from my sketchbook)
Here is a photo of me dyeing all item types
Health and Safety is noted in my sketchbook Chapter 6 page 6
These were made alongside the Shibori samples
Shibori is a name given to several methods where tight pressure is put on certain areas to form a resist to the dye, in this case leaving areas of white against black.
After at least three attempts I did not really suceed.
The following shows a photo of some prepared fabrics (four items on the right) and a couple of dyed samples, the best of a bad bunch. I assume that I was unable to get the mix of dye, salt and soda correct and/or timing of the dyeing and drying.
The final scan in this section indicates some of the dyeing mixes I used.
The subtle lines are appropriate for slug and snail markings
The first two photos show the stitching before and after the rows are gathered. I only did handstitched samples.
The samples were left to dry overnight.
I particularly liked the results and felt that all seemed to reflect the slug and snail theme.


Arashi Shibori
For this the fabric is wrapped around piping or in this case cardboard tubes (see two samples on the left of the first photo) sealed with cling film, tied tightly with string, gathered then painted with dye using a paint brush down the ridges.
They were then left to dry overnight.
Both samples were successful and seemed to provide an effect suited to slugs and snails.
Painted A4 size white cotton fabrics with black acrylic and clear fabric medium
The following handwritten sheets indicate the procedure followed to acquire a number of samples. (Taken from my sketchbook)
Here is a photo of me monoprinting all item types
Health and Safety is noted in my sketchbook Chapter 5 pages 1 and 5
The following samples are itemised above and are in order:
Samples MF2a and 2b, MF3a and 3b, MF6 (silk), MF7 (silk), MF8, MF9 and white acrylic with clear fabric medium on one of the grey dyed pieces.
Of all the techniques in this chapter I enjoy the rapid results achieved with monoprinting, with more effective tonal variation. I'm sure with practice the dyeing techniques will improve although I was very happy with the Tritik Shibori, in particular where tonal variaton was evident. Also these achieved the markings I wanted.
Last but not least another paper design achieved by leaving fabrics to dry flat on it. Maybe I could have done the same with some fabric!
Monday, 28 January 2013
Chapter 5 Making patterned papers
A4 patterned papers were made continuing inspiration from slugs and snails.
Samples were selected using different techniques:
Ink marks using Quink Ink
Bleach marks on black tissue
Monoprints using black acrylic paints
Ink marks using Quink Ink
All were made on A4 photocopy paper.
Each sample used unconventional drawing equipment.
The technique was written on the back of each sample
Here are 6 samples from 15. The first 2 used neat Quink ink, showing darker tones than the other 4, where diluted ink was used producing paler versions (not necessarily black or grey colours)
Q 1 Enlarged pattern from the lower parts of a snail, drawn with a sponge brush
Q 3 Snail shells, drawn using the end of the sponge brush and dabbed producing solid wetter ridges and drier ridges
Q 6 Parts of snail shells, using pieces of flat kitchen sponge, where lay down end then dabbed down rest of the sponge, giving a variety of tone
Q 7 Slug body, using toothed credit card approximately 3" wide for ridges overlaid with edge of sponge for speckled effect
Q 8 Part of snail shell using flat surface of a piece of sponge
Q 11 Snail shell with curved arrangement of marks using crinkled bathroom hand paper towels with interesting variety of tonal change
There is interesting tonal differences between samples.
Possibly even more effect on last 4 if neat ink was used.
Bleach marks on black tissue
The first 3 were made on slightly smaller A4 size black tissue paper, the final 4 on strips of black tissue approximately 4cm x 30 cm
Each sample used unconventional drawing equipment.
The technique of each sample was noted in the sketchbook
Here are 3 samples from 6, on A4 paper where the first used thin bleach the remaining 2 thicker bleach, with more effect.
B 2 Used a cut credit card approximaetly an inch wide with 3 cut points wiped intermittently across the paper. The crinkly paper adds to the texture
B 5 Used a cotton bud first dabs on the paper then wiped across
B 6 Used a plastic fork with short marks - It was interesting how the thicker bleach also added some interesting lines, catching drips across the paper
B 7 to 10 were respectively, wavy lines using a lollipop stick; wavy lines using a cocktail stick; wavy lines using a narrow piece of credit card; using a cotton bud
I feel like giving this technique another go using the thicker bleach might provide better results.
Also, found that I was abandoning reference to the animal markings, but got some interesting results nonetheless.
Monoprints using black acrylic paints
I particularly liked the results using this technique.
Some can be compared with the Quink Ink samples.
All were on A4 photocopy paper, having drawn or spread black acrylic paint on glass.
Each sample used unconventional drawing equipment.
The animal source and technique was written on the front of each sample
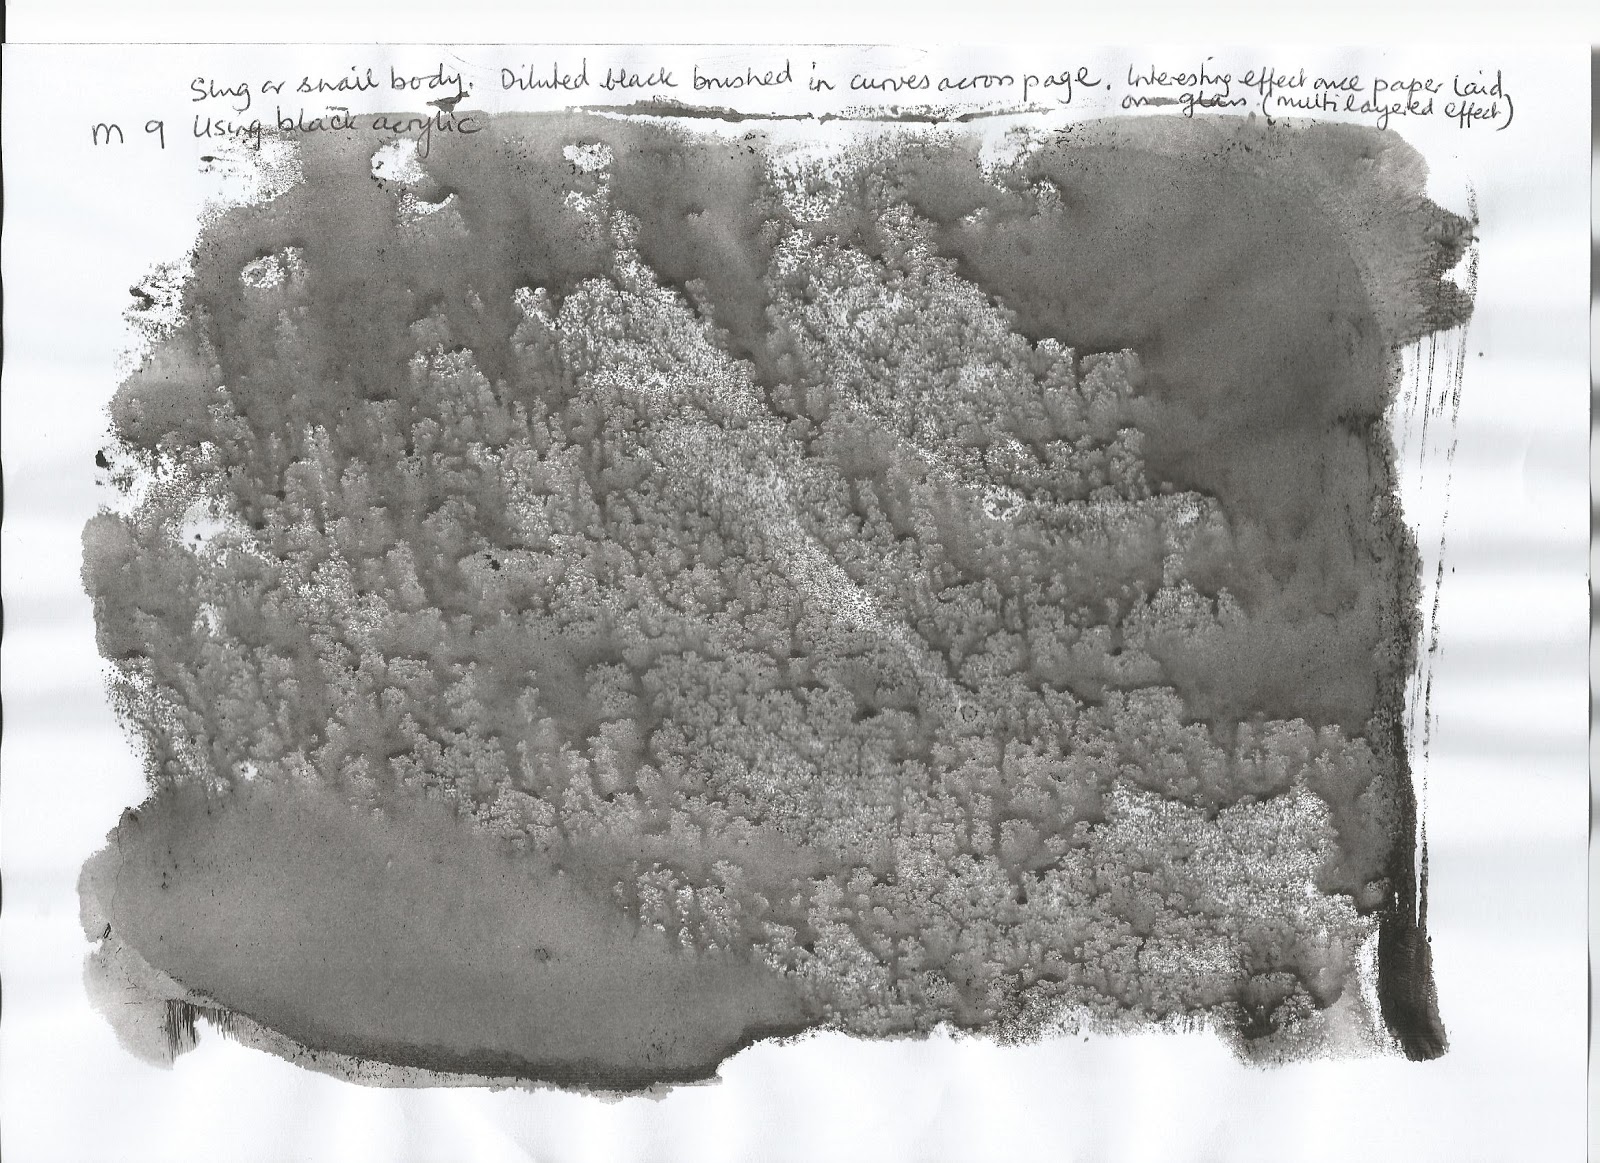
Here are 7 samples from the 9 samples made: M1,M2,M4,M5,M6,M7,M9
The first 6 used thick black acrylic, showing darker tones whereas the last used watery paint producing paler versions.
M6 and M7 also were the result of coating the glass with paint then removing paint to give white marks.
And what an interesting result from the kitchen roll used to wipe off the paint on the glass!
Some additions to this chapter related to scale in work, following up Sian's suggestion:
Two items resulting from scale manipulation of designs produced in word
Photo of a selection of original ink, bleach and monoprint designs showing tonal variation
Two items resulting from scale manipulation of designs produced in word
Looking forward to using the above in Chapter 7.
Photo of a selection of original ink, bleach and monoprint designs showing tonal variation
I added some designs not added earlier to my blog....
...and the next shows the top half closer up, including bleached black tissue.
It's really interesting seeing how scale can effect your work.
Samples were selected using different techniques:
Ink marks using Quink Ink
Bleach marks on black tissue
Monoprints using black acrylic paints
Ink marks using Quink Ink
All were made on A4 photocopy paper.
Each sample used unconventional drawing equipment.
The technique was written on the back of each sample
Here are 6 samples from 15. The first 2 used neat Quink ink, showing darker tones than the other 4, where diluted ink was used producing paler versions (not necessarily black or grey colours)
Q 1 Enlarged pattern from the lower parts of a snail, drawn with a sponge brush
Q 3 Snail shells, drawn using the end of the sponge brush and dabbed producing solid wetter ridges and drier ridges
Q 6 Parts of snail shells, using pieces of flat kitchen sponge, where lay down end then dabbed down rest of the sponge, giving a variety of tone
Q 7 Slug body, using toothed credit card approximately 3" wide for ridges overlaid with edge of sponge for speckled effect
Q 8 Part of snail shell using flat surface of a piece of sponge
Q 11 Snail shell with curved arrangement of marks using crinkled bathroom hand paper towels with interesting variety of tonal change
There is interesting tonal differences between samples.
Possibly even more effect on last 4 if neat ink was used.
Bleach marks on black tissue
The first 3 were made on slightly smaller A4 size black tissue paper, the final 4 on strips of black tissue approximately 4cm x 30 cm
Each sample used unconventional drawing equipment.
The technique of each sample was noted in the sketchbook
Here are 3 samples from 6, on A4 paper where the first used thin bleach the remaining 2 thicker bleach, with more effect.
B 2 Used a cut credit card approximaetly an inch wide with 3 cut points wiped intermittently across the paper. The crinkly paper adds to the texture
B 5 Used a cotton bud first dabs on the paper then wiped across
B 6 Used a plastic fork with short marks - It was interesting how the thicker bleach also added some interesting lines, catching drips across the paper
B 7 to 10 were respectively, wavy lines using a lollipop stick; wavy lines using a cocktail stick; wavy lines using a narrow piece of credit card; using a cotton bud
I feel like giving this technique another go using the thicker bleach might provide better results.
Also, found that I was abandoning reference to the animal markings, but got some interesting results nonetheless.
Monoprints using black acrylic paints
I particularly liked the results using this technique.
Some can be compared with the Quink Ink samples.
All were on A4 photocopy paper, having drawn or spread black acrylic paint on glass.
Each sample used unconventional drawing equipment.
The animal source and technique was written on the front of each sample
Here are 7 samples from the 9 samples made: M1,M2,M4,M5,M6,M7,M9
The first 6 used thick black acrylic, showing darker tones whereas the last used watery paint producing paler versions.
M6 and M7 also were the result of coating the glass with paint then removing paint to give white marks.
And what an interesting result from the kitchen roll used to wipe off the paint on the glass!
Some additions to this chapter related to scale in work, following up Sian's suggestion:
Two items resulting from scale manipulation of designs produced in word
Photo of a selection of original ink, bleach and monoprint designs showing tonal variation
Two items resulting from scale manipulation of designs produced in word
Looking forward to using the above in Chapter 7.
Photo of a selection of original ink, bleach and monoprint designs showing tonal variation
I added some designs not added earlier to my blog....
...and the next shows the top half closer up, including bleached black tissue.
It's really interesting seeing how scale can effect your work.
Subscribe to:
Posts (Atom)